0. 前提条件
- 系统是windows11
- 已经安装过powershell 7
- 安装过vscode编辑器
- 默认情况下,所有命令均在powershell下执行的
1. 安装 oh my posh
1.2 方式1: 通过代理安装
假如你有socks代理,那么可以用winget安装
打开你的power shell 执行类似下面的命令,来配置代理
$env:all_proxy="socks5://127.0.0.1:1081"
如果没有socks代理,最好不要用winget安装,因为速度太慢。然后执行:
winget install JanDeDobbeleer.OhMyPosh -s winget
1.2 方式2: 下载exe,手工安装
再oh-my-posh的release界面 https://github.com/JanDeDobbeleer/oh-my-posh/releases
可以看到很多版本的文件,windows选择install-amd64.exe, 下载完了之后手工点击执行来安装。
https://github.com/JanDeDobbeleer/oh-my-posh/releases/download/v8.13.1/install-amd64.exe
2. 配置 oh-my-posh
在powershell中执行下面的命令,vscode回打开对应的文件。
code $PROFILE
在文件中粘贴如下的内容:
oh-my-posh init pwsh | Invoke-Expression
保存文件,然后再次打开windows termial, 输入下面的命令来reload profile
. $PROFILE
然后你可以看到终端出现了提示符,有可能有点卡,第一次是有点慢的。但是很多符号可能是乱码,因为是没有配置相关的字体。
3. 字体配置
3.1 安装字体
- 下载文件 https://github.com/ryanoasis/nerd-fonts/releases/download/v2.1.0/Meslo.zip
- 解压文件
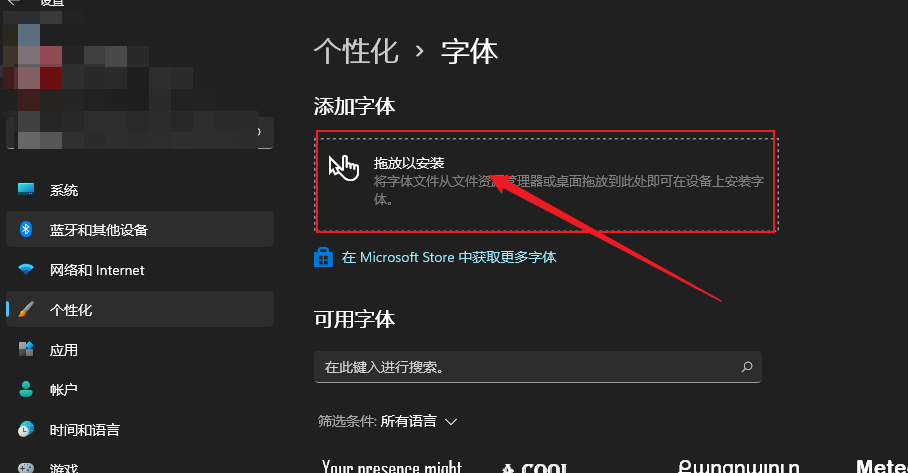
- 打开设置,在个性化》字体中,将之前下载好的所有字体,拖动到下面的红框中,字体就会自动安装

3.2 windows termial字体配置
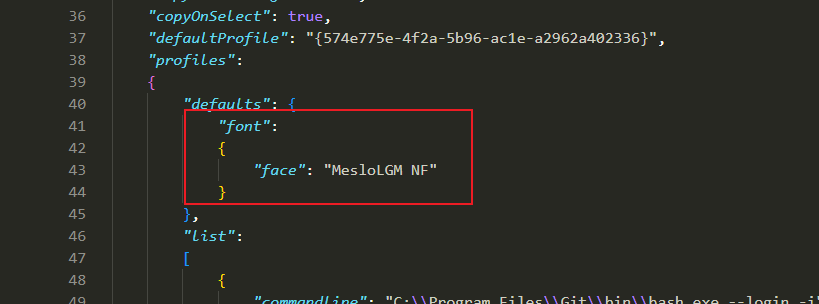
用vscode打开对windows termial的配置json文件,在profiles.default.font中配置如下字体
"font":
{
      "face": "MesloLGM NF"
}

配置之后,需要重启windows termial
3.3 vscode termial 配置
在vscode中输入 Open Sett, 就可以打开设置的json文件。
 在配置中设置如下的内容
"terminal.integrated.fontFamily": "MesloLGM NF",
4. 效果展示
4.1 windows terminal

4.2 vscode terminal

5. 体验
- 优点
- oh-my-posh 总体还不错,能够方便的展示git相关的信息
- 缺点
- 性能拉跨,每次终端可能需要0.5s到2s之间的延迟卡顿,相比于linux上的shell要慢不少